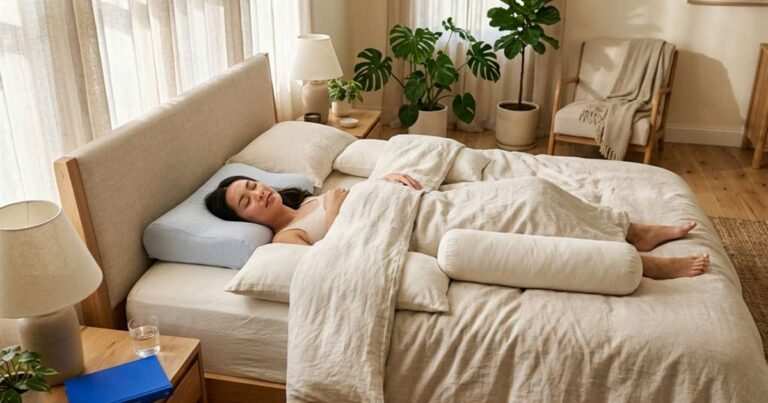
Most People give advice about training yourself to sleep on your back tell you to put pillows around your body and be patient. That advice is not wrong, but it skips two things every guide should lead with: the contraindication that makes back sleeping actively harmful for a significant portion of the population, and the pillow geometry that determines whether the position is comfortable enough to maintain for a full night.
The contraindication first. Back sleeping (the supine position) pulls the tongue and soft palate backward under gravity, narrowing the upper airway. A review published in Sleep and Breathing identifies supine-related obstructive sleep apnea as the most common clinical phenotype of OSA, with respiratory events occurring at twice the frequency in the supine versus non-supine position in position-dependent patients. If you snore heavily, wake gasping, or have a diagnosed or suspected sleep apnea condition, do not train yourself to sleep on your back without first consulting a physician or sleep specialist. For that group, side sleeping is the clinically supported intervention, the opposite of what this guide describes.
If back sleeping is appropriate for you, the position carries genuine structural advantages. The pillow setup required to make it work is addressed below in detail, and our guide to the best pillows for back sleepers goes deeper on product specifics. This guide covers the five-night transition protocol, the three-piece pillow system, and what to do when the position doesn’t stick past night two.
⚠️ If you have any existing neck, spinal, or breathing condition, consult a physiotherapist or physician before changing your sleep position.
Why Back Sleeping Is Worth the Effort
The supine position is the only common sleep posture that simultaneously keeps the spine in neutral alignment, eliminates facial compression against the pillow, and distributes body weight symmetrically across the posterior surface.
On the spinal alignment case: a 2015 study published in the Journal of Biomechanical Engineering (PMC) measured cervical spine alignment at multiple pillow heights in the supine position and found that appropriate pillow height in the 10 cm range maintained a C2-C7 Cobb angle of 14.9°, within the physiologic normal range for cervical lordosis. The supine position, correctly supported, is structurally the least demanding position for the cervical and lumbar spine simultaneously, neither the rotational load of stomach sleeping nor the lateral flexion risk of side sleeping with an ill-fitting pillow applies.
On the skin case: a 2016 study in the Aesthetic Surgery Journal confirmed that side and stomach sleeping produce distinct mechanical compression wrinkles from sustained facial distortion during sleep. Back sleeping eliminates face-to-pillow contact entirely, removing the primary mechanical mechanism behind compression-pattern wrinkles. This is not a cosmetic afterthought, it is the reason physiotherapists and dermatologists converge on the same recommendation from entirely different angles.
The Three-Piece Pillow System
Barrier pillows alone, the standard advice, solve only one of three mechanical problems. Back sleeping fails for most habitual side or stomach sleepers because three things go wrong simultaneously: they roll out of position during the night, their lower back arches into discomfort without knee support, and their neck sits at the wrong angle without cervical support. Each requires a separate intervention.
Piece 1: The Cervical Contour Pillow (head and neck)
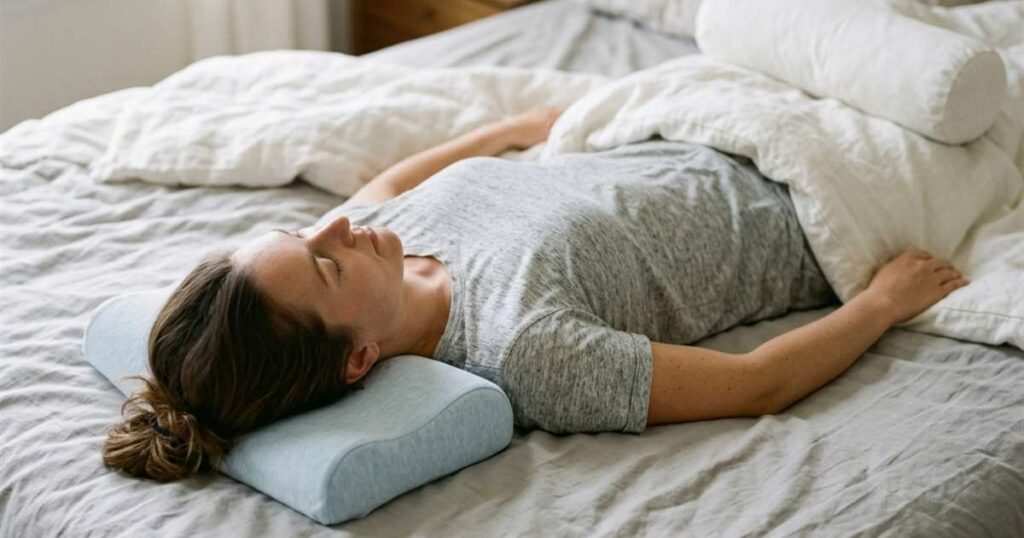
A standard rectangular pillow supports the back of the head but does not support the cervical lordosis. The natural inward curve of the neck between the head and shoulders. In the supine position, that curve hangs unsupported over the gap between the occiput and the mattress, which keeps the surrounding muscles active all night rather than letting them relax. A cervical contour pillow (also called a cervical roll pillow or orthopedic pillow) has a raised neck roll at the bottom edge that fills this gap, and a recessed central area that cradles the head without pushing it forward.
Optimal loft for the supine position: studies converge on approximately 7-10 cm (roughly 3-4 inches) as appropriate for most adult body proportions on a medium-firm mattress, per the 2021 systematic review cited in the Healthcare journal (PMID 34683013). More than 10 cm actively overextends the cervical curve; less than 7 cm leaves the lordosis unsupported. The practical instruction: lie flat, look directly at the ceiling (not chin-to-chest, not chin-to-sky), and feel whether the neck has support from below. If the answer is no, the pillow is too flat. If the chin drops toward the chest, the pillow is too high.
Piece 2: The Knee Bolster (lumbar decompression)
When the legs lie fully extended on a flat mattress, the hip flexors pull the pelvis into anterior tilt, which exaggerates the lumbar curve and creates low back pressure that wakes most people within an hour of lying supine. A small cylindrical bolster pillow or folded firm pillow under the knees, raising them roughly 4-6 inches, releases the hip flexor tension and flattens the lumbar arch to a neutral position. This single addition resolves the majority of lower back discomfort that stops new back sleepers before the first night is complete.
The knee bolster does not need to be a specialty product. A firm pillow folded in half works. The goal is consistent elevation of the knees, not precision, the lumbar response to even modest hip flexion is significant.
Piece 3: Body Pillows Against the Hips (barrier system)
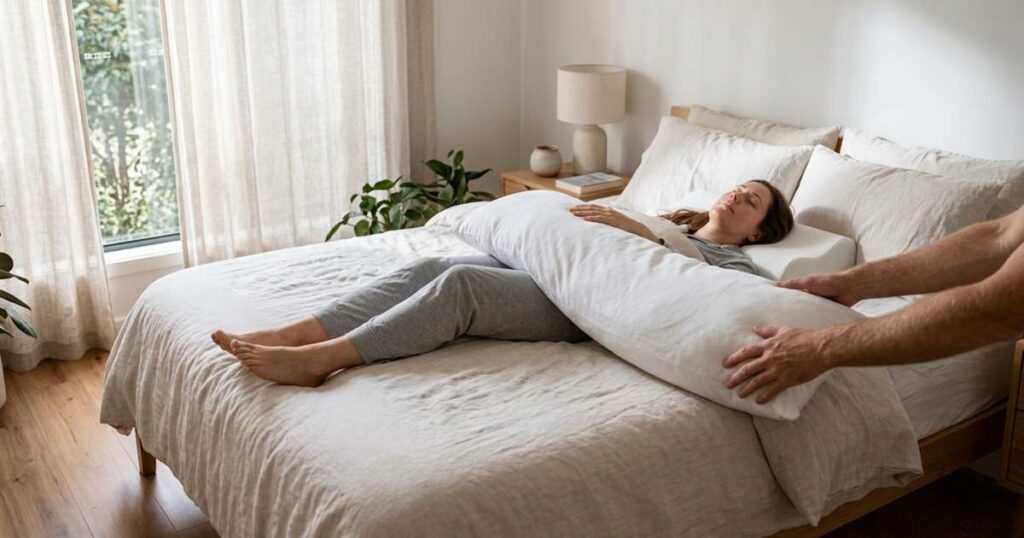
A study published in Sleep Medicine Research on body pillow effects found that body pillow use extended the duration of a sustained lateral sleeping position in participants. Demonstrating that physical barriers meaningfully reduce unconscious position changes during sleep. The same mechanism applies in reverse for training back sleeping: placing firm body pillows or tightly rolled blankets along both sides of the torso, from shoulder level to hip level, creates proprioceptive resistance that interrupts rolling before it becomes full position change. The barrier does not need to be uncomfortable. It needs to be firm enough that rolling into it creates a tactile signal that wakes the sleeper briefly.
One body pillow on each side, or two standard pillows stacked vertically on each side, accomplishes this. Position them flush against the hips and ribs rather than at a gap. A gap eliminates the early-detection function.
The 5-Night Training Plan
Night 1: Establish the Setup
Goal: get the three-piece system in place and fall asleep in position. Rolling is expected.
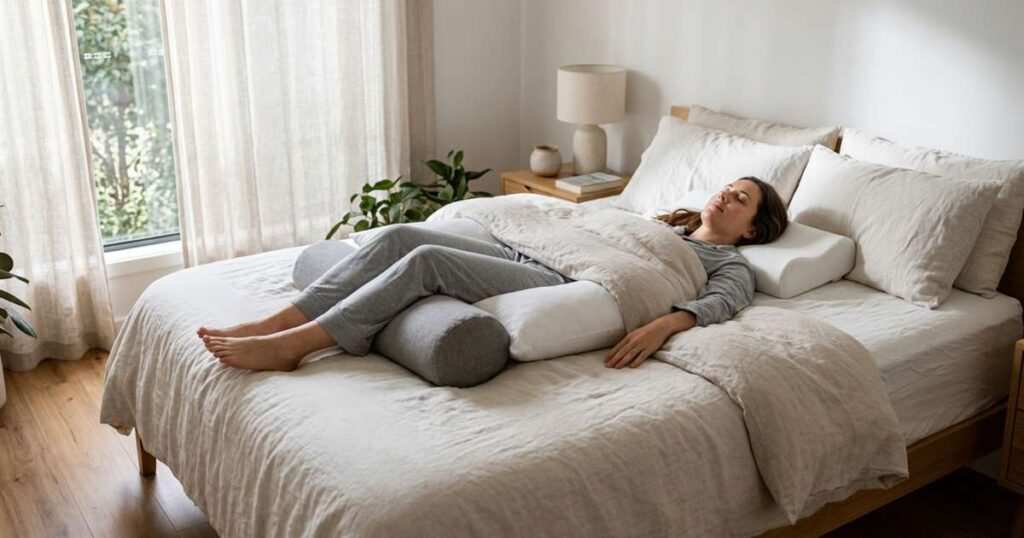
- Place cervical contour pillow at head, neck roll at the bottom edge, head in the recessed center.
- Slide a firm bolster or folded pillow under both knees, raising them 4-6 inches.
- Place body pillow or two stacked pillows flush against each hip, both sides.
- Arms: resting at sides or lightly on stomach, not overhead (shoulder strain risk).
- Note on waking: which direction did you roll? Which piece failed first?
Night 2: Diagnose and Adjust
Goal: fix the specific failure from Night 1. Most failures are either barrier gaps or pillow height.
- If you rolled sideways: push the hip barriers closer, eliminate any gap between barrier and body.
- If lower back ached: raise the knee bolster height or add a second folded pillow underneath it.
- If neck felt strained: check cervical pillow height, chin should be level, not tilted up or down.
- Repeat setup with adjustments and fall asleep in position.
- Note: did the adjustment change anything when you woke?
Night 3: Extend Duration
Goal: wake in position at least once during the night rather than only at the start.
- Repeat Night 2 adjusted setup without changes, let the body begin adapting.
- If you wake mid-night on your back: count it as a win, your barriers are working.
- If you consistently roll to one side: add a rolled blanket on that side in addition to the pillow.
- Optional: try progressive muscle relaxation (tighten then release each muscle group, toes to shoulders) Before lying down, reduces the urge to shift on first contact with the bed.

Night 4: Reduce Dependence on Barriers
Goal: test whether one barrier side can be reduced without rolling.
- Remove the barrier from the side you rolled to less, keep the dominant-roll side in place.
- Keep cervical pillow and knee bolster unchanged.
- Note whether removing one barrier caused rolling, restore it if yes.
- Note how many times you woke vs. nights 1-3. Improvement in sleep continuity indicates adaptation.
Night 5: Consolidate
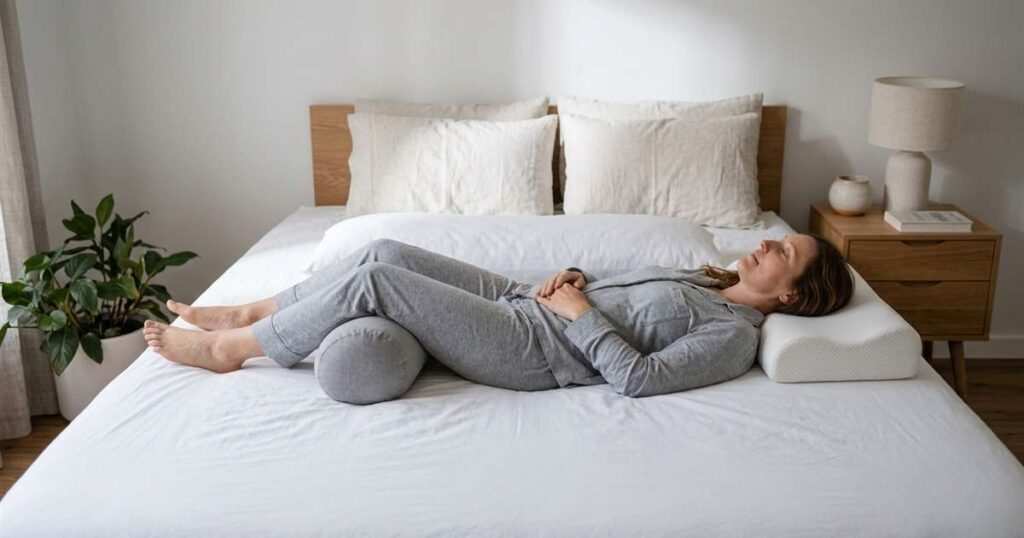
Goal: run the setup that worked best across nights 1-4 and assess whether it’s sustainable.
- Run the most effective setup from the previous four nights.
- On waking: assess neck, lower back, and sleep continuity versus your previous position.
- If neck or back is worse than before the transition: the pillow setup needs further adjustment, do not continue without addressing the geometry.
- If sleep is comparable or better: continue the setup for two further weeks before reducing barriers.
- If snoring or gasping has increased: stop and consult a physician before continuing.

What Happens if the Position Doesn’t Stick
Five nights is a realistic minimum for establishing a new sleep position as the default starting position. It is not a guarantee of full transition. Positional therapy research consistently identifies two to four weeks as the adaptation window for position changes to become habitual, with the first week representing the highest dropout risk.
The two most common failure modes past night two are mechanical and comfort-based, and each has a specific fix.
Mechanical failure (rolling despite barriers): The barrier is either too low, too far from the body, or too soft to provide resistance. Replace soft pillows with a tightly rolled blanket or a firm cylindrical body pillow. The barrier needs enough resistance to wake you briefly when you roll into it, not enough to cause pain, but enough to interrupt the rolling before it completes.
Comfort failure (back aching, neck stiffening): The pillow geometry is wrong for your body proportions. The most common error is a cervical pillow that is too tall, pushing the head forward and flexing the neck. The second most common is insufficient knee support, the bolster is compressible enough that it flattens within an hour, leaving the lumbar spine to arch again. Swap a compressible bolster for a firmer one, or use a hard foam block at a fixed height rather than a pillow.
If the position produces neck pain, shoulder pain, or waking stiffness that persists beyond five nights of setup adjustment, the pillow geometry needs individual calibration. A cervical pillow sized specifically to your neck length and mattress firmness addresses this more precisely than a generic recommendation can.
Arms, Snoring, and the Two Questions You Will Get Wrong Without Help
Where to put your arms: Arms resting at the sides or lightly on the stomach are biomechanically neutral in the supine position. Arms overhead, the “starfish” position, keep the shoulder in abduction for extended periods, which can load the rotator cuff and cause shoulder impingement in people with existing shoulder tightness. For new back sleepers, start with arms at the sides. If that produces numbness or discomfort in the hands from pressure on the ulnar nerve, try one arm resting lightly across the lower abdomen.
Snoring: Back sleeping significantly increases snoring in most people by allowing the tongue, uvula, and soft palate to fall backward under gravity, narrowing the airway. If your partner reports new or significantly increased snoring after you begin back sleeping, or if you wake with a dry mouth, headache, or gasping sensation, stop the protocol and consult a physician. These are potential indicators of positional obstructive sleep apnea, which requires medical assessment, not a different pillow.
The Contrarian Point: The “5 Nights” Headline Is Honest Marketing, Not a Clinical Claim
Every guide on this topic, including this one, uses a night count to make the process feel finite. The honest version is that five nights establishes the mechanical habit of starting in the correct position, using the correct setup. Whether your body stays there through REM cycles and position changes during deep sleep is a separate question that takes longer, typically two to four weeks of consistent setup before the position becomes reliably maintained without full barrier dependence.
The five-night protocol is real and useful. But if you are still rolling by night five, that is not failure. That is normal adaptation pace. Continue the setup. The research on positional therapy consistently shows that compliance improves over the first four weeks as the proprioceptive memory for the position strengthens.
Frequently Asked Questions
How do you train yourself to fall asleep comfortably on your back?
The most effective method is placing a supportive pillow directly under your knees. This flattens your lower back against the mattress and relieves lumbar strain. You can also tuck extra pillows under each arm to create a secure feeling. If you consistently wake up uncomfortable, check if your mattress is too firm.
Why do side sleepers feel exposed when trying to sleep on their backs?
Side and stomach sleepers are used to the feeling of enclosure. Lying flat on your back removes that physical pressure and can trigger a subtle feeling of vulnerability. Tucking a thin pillow under each arm provides tactile feedback that mimics the security of a side-sleeping position.
Should I worry if I roll over after falling asleep on my back?
You should only focus on the position you fall asleep in. It is entirely natural for the human body to shift positions to relieve pressure points during the night. Trying to lock yourself into one posture will just cause insomnia. Over time, your body will naturally spend more hours back-sleeping.
How long does it take to train yourself to sleep on your back?
Five nights establishes the starting-position habit and the mechanical setup. Full habituation. Where the body maintains the position through unconscious position changes during sleep. Typically takes two to four weeks of consistent setup, based on positional therapy adaptation data. Expect some rolling throughout the transition period; it does not mean the protocol is failing.
What is the best pillow for back sleeping?
A cervical contour pillow that supports the neck lordosis while cradling the head at a loft of roughly 7-10 cm (3-4 inches) on a medium-firm mattress. Standard rectangular pillows at equivalent height lack the neck roll that fills the gap between the occiput and the mattress. The full cervical pillow guide for back sleepers covers the specification details.
Is it bad to sleep on your back with your arms above your head?
Not structurally harmful for most people in the short term, but arms-overhead holds the shoulder in sustained abduction, which can cause rotator cuff strain and impingement in people with existing shoulder tightness. Arms at the sides or resting lightly on the lower abdomen are the neutral starting positions.
Should I sleep on my back if I snore?
No, or at minimum, proceed with medical clearance first. Back sleeping is the strongest positional driver of snoring and obstructive sleep apnea because it allows airway soft tissue to fall backward under gravity. If you snore, or if snoring increases when you begin back sleeping, consult a physician before continuing. Side sleeping is the clinically supported position for snorers.
Do body pillows actually stop rolling over?
Yes, with appropriate setup. Research on body pillow use in sleep position maintenance confirms they extend duration in the target position by providing proprioceptive resistance to rolling. The key variable is placement: flush against the hips and ribs, not at a gap. A gap eliminates the early-tactile-signal function that interrupts rolling before it completes.